GitLab
This document details how to use GitLab as an identity provider with Pomerium. It assumes you have already installed Pomerium
While we do our best to keep our documentation up to date, changes to third-party systems are outside our control. Refer to GitLab as an OAuth 2.0 authentication service provider from GitLab's docs as needed, or let us know if we need to re-visit this page.
Setting up GitLab OAuth2 for your Application
Log in to your GitLab account or create one here. If you're using a self-hosted instance, log in to your custom GitLab domain.
From the User Settings area, select Applications. Create a new application:
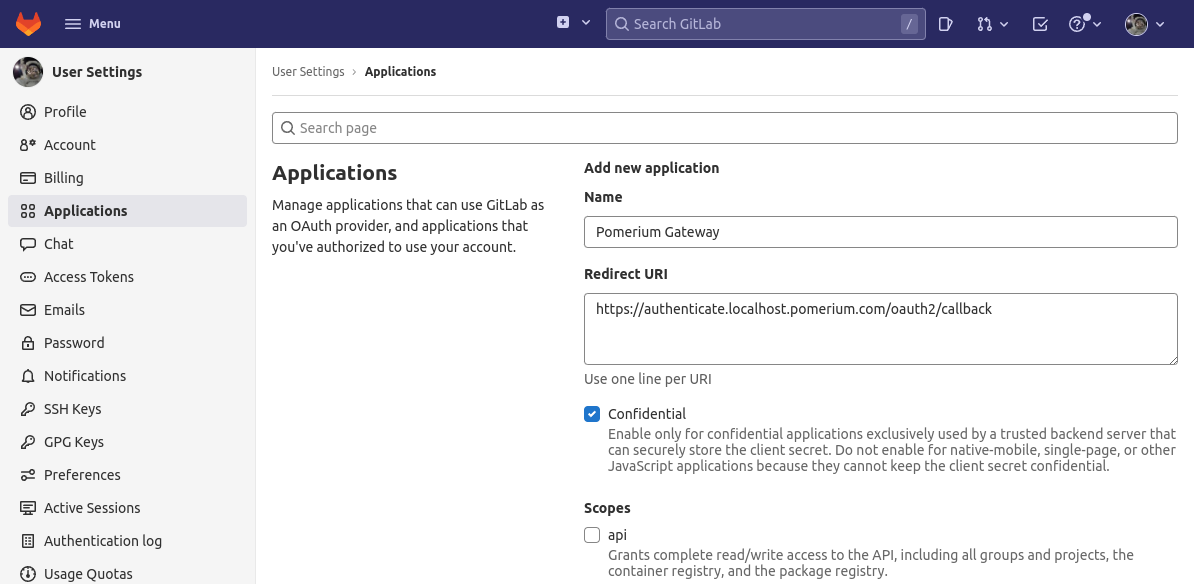
Add a new application by setting the following parameters:
Field Description Name The name of your web app Redirect URI https://${authenticate_service_url}/oauth2/callbackScopes openid,profile,emailClick Save application.
Your Application ID and Secret will be displayed:
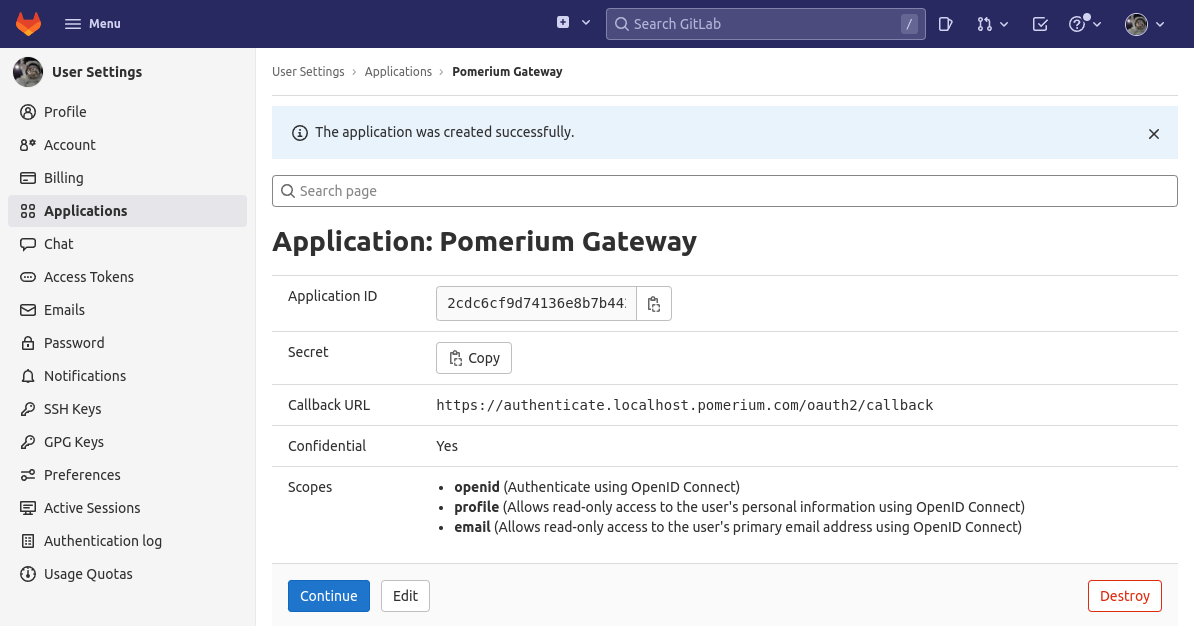
Note the ID and Secret to apply in Pomerium's settings.
Pomerium Configuration
Edit your Pomerium configuration to provide the Client ID, secret, and domain (for self-hosted instances):
GitLab.com
- config.yaml
- Environment Variables
idp_provider: 'gitlab'
idp_client_id: 'REDACTED' # gitlab application ID
idp_client_secret: 'REDACTED' # gitlab application secret
IDP_PROVIDER="gitlab"
IDP_CLIENT_ID="REDACTED" # gitlab application ID
IDP_CLIENT_SECRET="REDACTED" # gitlab application secret
Self-Hosted GitLab
Self-hosted CE/EE instances should be configured as a generic OpenID Connect provider:
- config.yaml
- Environment Variables
idp_provider: oidc
idp_client_id: 'REDACTED'
idp_client_secret: 'REDACTED'
idp_scopes: openid,profile,email
idp_provider_url: https://gitlab.example.com # Base URL of GitLab instance
IDP_PROVIDER="oidc"
IDP_CLIENT_ID="REDACTED"
IDP_CLIENT_SECRET="REDACTED"
IDP_SCOPES="openid,profile,email"
IDP_PROVIDER_URL="https://gitlab.example.com" # Base URL of GitLab instance
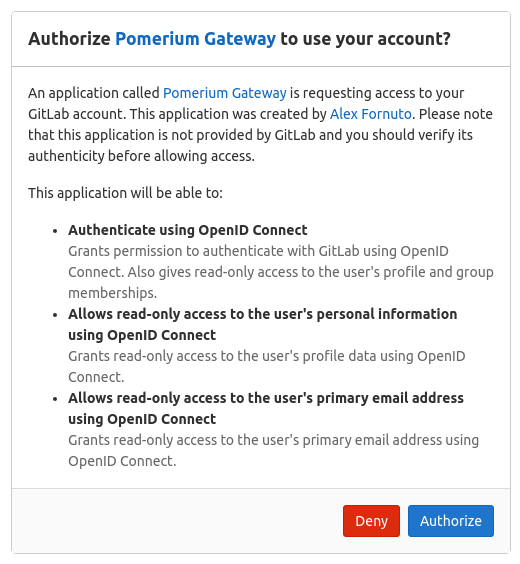
When a user first uses Pomerium to login, they are presented with an authorization screen:
- Custom Claim (Open Source)
- Directory Sync (Enterprise)
Custom Claim (Open Source)
Unfortunately, Gitlab does not support OpenID Connect, and does not support custom identity (id_token) group claims.
Directory Sync (Enterprise)
In order for Pomerium to validate group membership, we'll also need to configure a Personal Access Token in Gitlab.
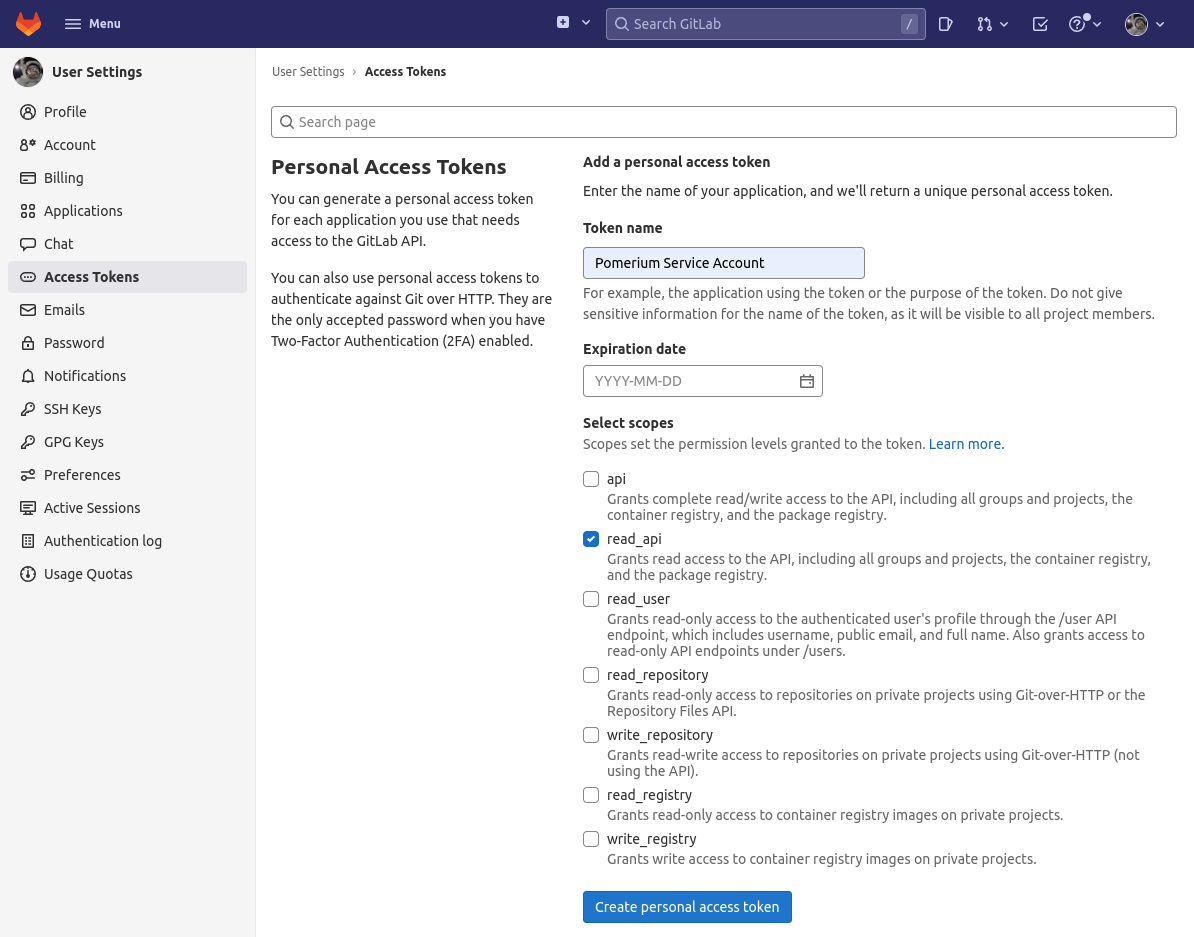
Configure Pomerium Enterprise Console
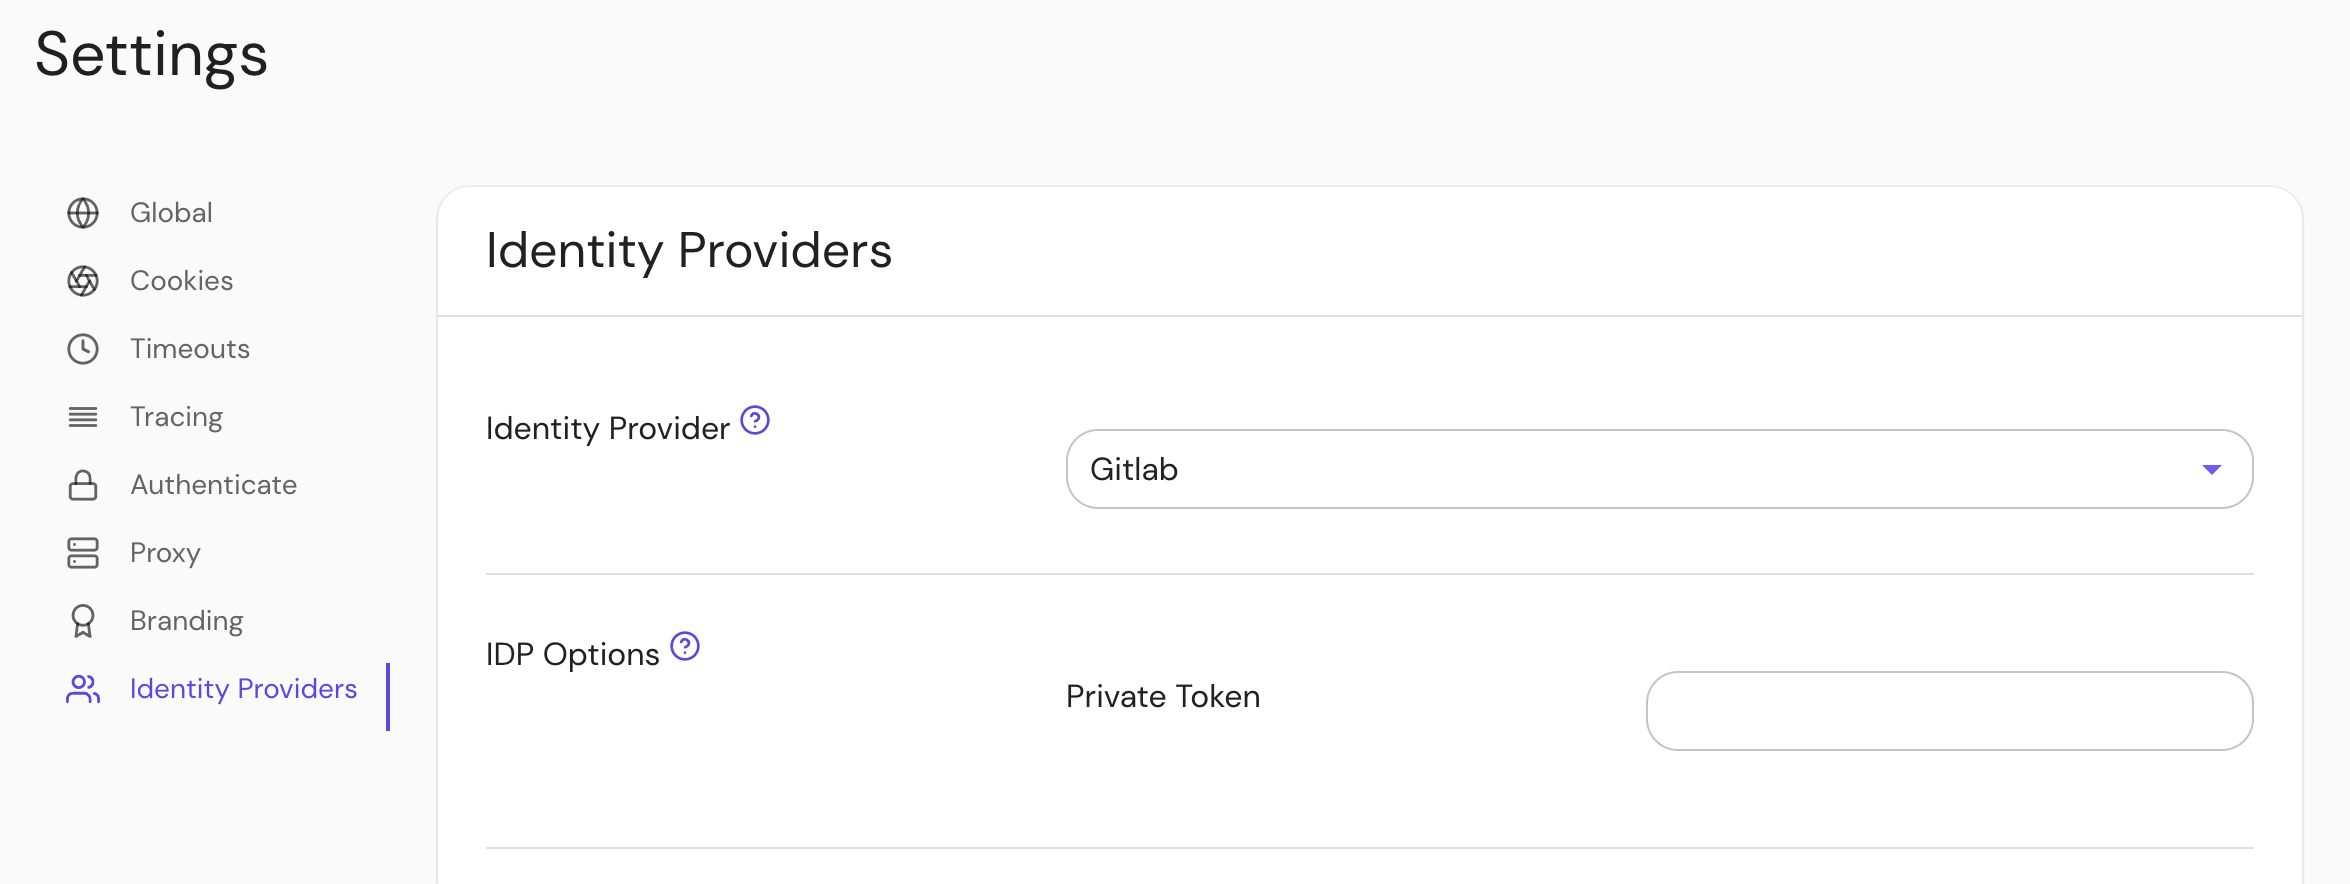
Under Settings → Identity Providers, select "Gitlab" as the identity provider and set the Private Token.
